Thursday, December 27, 2007

From pendant to necklace


Here is the necklace put together from the pendant and beads that I made last week. I hope you enjoy the tutorial and try this technique for yourself. I do not wish to call this my own invention because it was the combination of techniques I've learned through my journey with Polymer clay and still, there is a lot to learn and explore.


I also made this Red necklace early this month. Shown, how I prepare the pendant and matching beads.
This necklace I sold to a gentleman who bought it for his wife. I sold 2 necklaces for another gentleman who also bought them for his wife too. They are all Red necklaces.

Now that I got this technique down to the science, it's time to explore a different one.

Here's what I am working on right now. Still, the technique needs to be refined but I've gotten a good result so far.


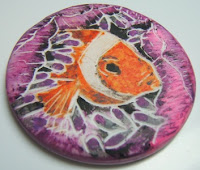
This one is a drawing from the book that my son gave to me as a present. It is a book with pretty photographs of the fishes and animals that live under the sea.
Sad to tell you that I bombed this pendant in the process, so it will sit in a jar until I figure it out what to do with it.
Oh, well, that's how we learn from our mistakes.

Sunday, December 23, 2007

Questions & Answers

Q: What kind of rubber stamp sheet that I use?
A: I used Barbara McGuire's rubber stamp sheet. www.barbaramcguire.com She is also on ETSY, you can order her stamp from there. Her stamps have deep grove and thin lines, perfect for the technique that I use.

Q: What kind of varnish that I used?
A: If I am using Metallic powder on my beads, I put on one coat or two of Fimo Gloss varnish. I used to put varnish on everything until the customer asked if I can make it Matt, so I stop putting varnish on my beads. I don't sand and buff my beads, occasionally, I brush on a thin coat of Future floor finish.
Sometime I sand and buff my pendants. It depends on the design and the look that I want. Most of the time I just rub it on my pants, or a piece of carpet to make it smooth and has a little bit of sheen on it.

Q: If you have any questions and want to ask me, what can you do?
A: Feel free to email me with any questions that you have. www.silastones@aol.com I am on-line all the time.

Q: You want to buy my jewelry, how?
A: I have my jewelry on consignment at Lilly's boutique in Zionsville. I also sell at craft shows and art shows around town. If you see something that you like, email me. First come, first serve, because most of my works are one-of-a-kind. I am also trying to put more stuffs on my ETSY store. My friend also sell my beads at Intergalactic bead show.

Thank you
Hugs
Ponsawan

Tuesday, December 18, 2007

Pendant 101

I just post the tutorial on my other blog of how I made my pendant. You can see it HERE.
For the sake of the argument, many people had called it "Hidden Magic" technique. For me, there is no magic there because I was the one who hide the treasure underneath that Black&White sheet, so I know exactly what the result is going to be.
There are many different ways to do it and it is "Magic" because your will get the image that is unexpected, just like the techniques used by many French clayers.

***The rubberstam sheet that I used is from Barbara McGuire's. www.alteredartsource.com ***

Saturday, December 15, 2007

What to do with a slab of Mokume Gane


I really like this technique of layering the different color clays together, poke it with different kind of objects, then slide it with the thin blade and hope for the good. Rule of thumb that I use is to alternate the darker color with the lighter color, for example; dark blue, pearl, dark green, then light blue. Also sliding it in an angle will give you the pattern that looks like waves with bubbles.

Now what to do with it.

For this slab, I make the cuff, which was part of the claypen project then I covered the Altiod box. After shaving it for a while, with the bottom layer, I got myself a perfect pattern for the pendant. So I got 2 necklaces out of it and probable 2 pair of earrings and a ring that i am going to make next.
This way when I do the show, I can group my jewelry into a set with similar design and color. Now that I have Blue&Green, next will be Pink&Purple, Red&Copper, Brown&Orange, etc.

Thursday, December 13, 2007

Under construction part 2


The construction project is underway. I feel like myself again, walking through the construction site, checking the drawing, the dimension and picking out floor material, wall color and furniture. You can see the counter bar is taking shape, the liquor cabinet behind the bar with space for the big screen TV, the ceiling is ready for the track light and the floor is ready to covered with dark brown vinyl, wood look alike material which will prevent slippery when wet. All the materials used are soy sauce proof. You should see the contractor's face when he saw me pouring soy sauce on everything. LOL . After all, this is a Sushi restaurant and soy sauce do stains. Now, up stair will be the banquet room, I called it the "Red Room"

As you can see, it is RED, very red. I picked the color and love it. The dark brown color from ceiling and floor should tone it down. The utility pipe will be copper. A couple of Geisha paintings would definitely gave this room a talk of the town. I asked my boss if i can do Mural Painting upstairs. What do you think? We will cover the windows with Bamboo. My boss will visit Ikea next week to pick up the lighting and lamp shades.
We should have fun decorate the place. My boss totally trust me on this, which is nice. I hope we get it done in 3 weeks so we can have our New Year party in the "Red Room"

Tuesday, December 11, 2007

Recycled artwork


Inspired by the post on Polymerclaydaily, I was looking for the way to alter these discs that I painted sometime ago. Not that it is ugly, but not good enough for me. Throw them away or do something with them. I started out by wiping them with the wet paper towel, some paint came off but left the nice blend of pastel color. With the Speedball carving tool in hand, I started carving it. First, the leaves, then swirly pattern. Not bad, ha!


I still have a box full of clay pieces that I made and don't know what to do with them. Cut them into small pieces and cover a counch, not a bad idea either.


Here are some discs that I put the frames on them. The "Sunset on the rough sea" is leaving to Paris with my daughter. The other were send to Thailand to be auction off at the Class Reunion along with a necklace, a bracelet and more pins. All the money will go to the good causes.